
May 23, 2024 at Esther’s house
Attendees: Angela, Emily, Esther, Kristin, Lisa, Lisa’s daughter, Janice, Julie, Sandra, Shea, Susan
Inspiring woman: Joan Jacobs. Joan recently passed away. She was an inspirational philanthropist in San Diego for the past 30+ years. She and her husband, Irwin Jacobs, founder of Qualcomm Inc., gave millions of dollars to San Diego’s art and music centers as well as other health organizations and the San Diego Food Bank. She died at the age of 91. Her husband Irwin remains alive and thriving in La Jolla.
Transcript from audio recording
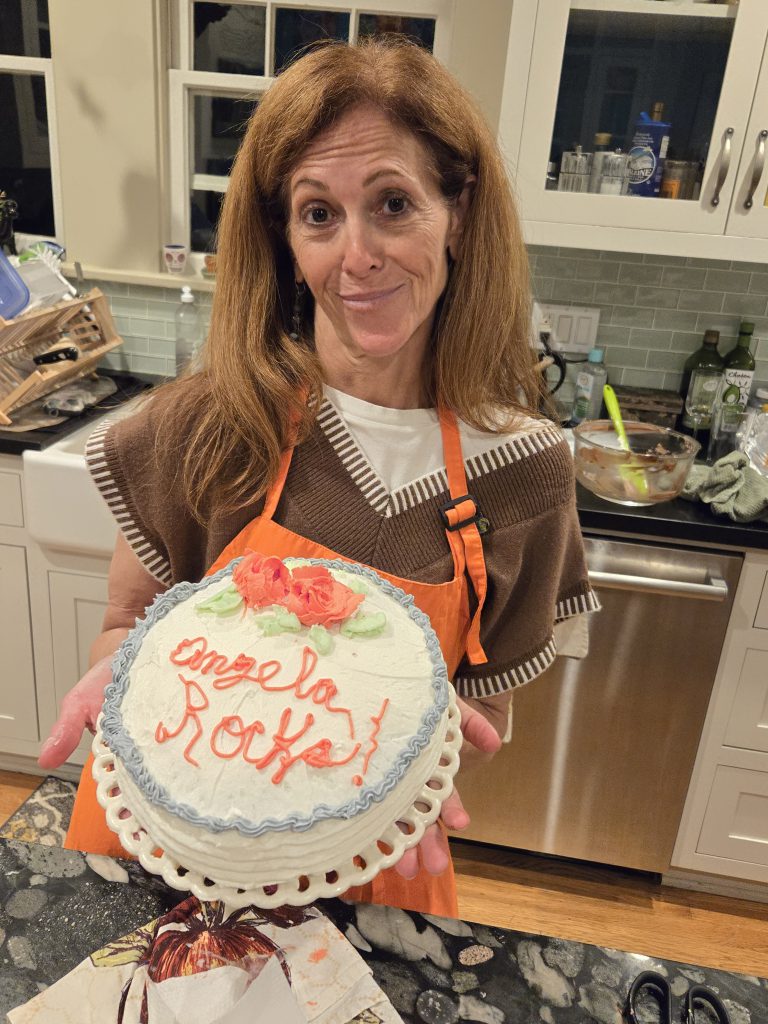
Angela worked in a bakery during the holidays. Because you have to go to work at 5:00 in the morning and some on Saturdays and Sundays. Yeah, you’re making cakes all day, every day, all weekend. I came to hate holiday, I hated them, but that’s because now I love them because now I’m not. I’m not a girl anymore. then my husband and I moved to Spain and I actually. Baked cakes and decorated cakes there. Because I lived while we were associated with an American base. There wasn’t places to get American style cake. then I was like, I can do that. And I worked at a place which had a commercial oven, I was able to bake at the place where I worked. And then decorated at our apartment. And then they actually funded cake decorating.
that was really cool. And then kind of put it up for a while and then we would just do my boys birthday cakes or how it like fried. Moose fundraisers or I would do cupcakes or, you know, stuff like that. And then recently, because I kind of had a job switch, I kind of really thought about doing cakes again. I’ve. Sort of a couple of people have hired me here and there to make cakes since that’s been really fun. And I’ve really been learning about baking now because before it was just all about cake, just using a box mix because I just had to, like, get it out. now I’m actually like really finding recipes that I want to try and seeing how I can. Doctor up box cake mixes, which is what I did here. this is a yellow cake mix. I think it might have been Duncan Hines. And what I did to this was it calls for three eggs. I did 4 eggs. It called for oil. I use melted butter. It calls for water, but I use milk, little things like that. And you can find all the stuff. That’s on the Internet. All of that just makes the cake. Taste better. It makes a bake differently. Another thing. another thing you wanna do is you wanna have your eggs to room temperature before using them for. Baking butter. Butter. Butter.
I don’t know why. Well, you even want them to room temperature when you eat them. Like, just even frying eggs for breakfast, you want them? The proteins act differently, you want them to actually be at room temperature. I. Always have not. A carton of eggs. But I have like 4 eggs out. Because you never know when you’ll have emergency bake.
Well, if I don’t have some sitting out and I need to bake, what I’ll do is I’ll crack them open and put them like in a shallow dish they can come to room temperature faster. You want to have, if you’re going to use water, and I don’t know why this is, it’s part of the science. Experiment. You need to have ice cold water, you want really cold water. But if you’re going to use milk then you need room temperature milk. Again, it’s about the proteins. that.
QUESTION you mentioned like four different things you did. You added an extra egg.
I use melted butter instead of oil.
I’ve always known the room temperature egg. I always knew that. And I always need the ice cold water part because I’m working in the bakery. I saw that. I knew that part. But the milk and the butter, that’s just kind of been a more recent addition.
Whatever your cake box says for mixing time, you want to follow it like it’s going to say mix for two minutes. You want to mix for two minutes because it gets that error in the cake batter. I have one cake that I make. It actually takes 5 minutes of beating. And what it los like at the beginning and what it los like at the end are two totally different matters. whatever your batter, whatever your mix says or your direction say, make sure you act. I mean, I’m like, Alexa, set a timer for. Comments and I follow those directions because it really does make a difference.
QUESTION: what size cake pan did you use?
This is an 8 inch cake pan. This was because I had to make cakes from scratch. You guys made cakes from scratch. How did you measure your flour? Did you use the measuring cup and the scoop and the scrape?
Good.
I weigh, I weigh my stuff like because usually the recipe will say how many grams you need. I will actually weigh it. No.
Didn’t sift.
I will put all my dry ingredients together and sugar is a wet ingredient. It’s not a dry ingredient, I will take my wet, my dry ingredients and I’ll mix it with the whisk, but I’m not going to right? No, but sugar is a wet ingredient.
Exactly. And the butter. It’s technically considered a wet ingredient.
QUESTION: Should we be using 8 inch or 9 inch rounds?
It doesn’t matter.
But if it were 8 inch, would it be higher like that?
Yeah, possibly, possibly. And then too, I use. I don’t use butter and flour or crisco and flour, I just use coing spray, Around the pan, a really good coating of it. Lately I’ve been using bakers joy because it does have a little bit of flour in it, but generally if I don’t have Baker’s dry, I’ll just use coing spray.
I use butter and flour, yes.
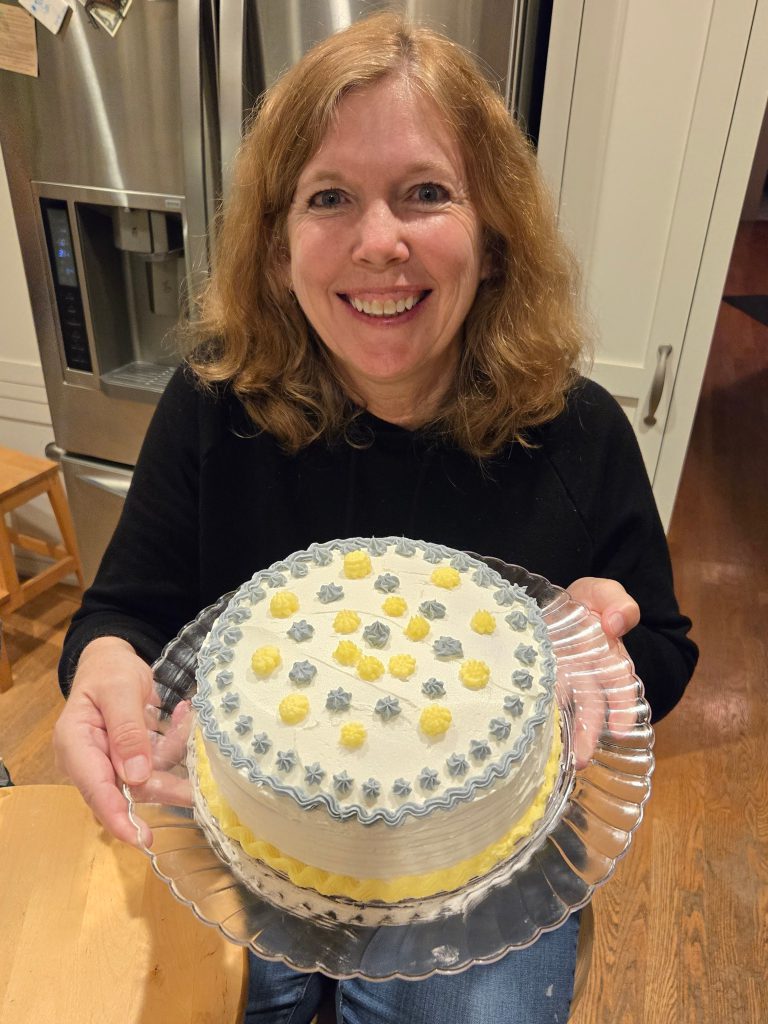
My cake has a pattern on top only because my cooling rack is a grid.
you definitely want to whatever the direction say. If it says keep it in the pan for 5 minutes and then dump it out onto the cooling rack, that’s what you want to do. Follow the directions.
What I like to do if I’m going to use a cake board which is like just a piece of cardboard because I’m delivering a cake to somebody and I don’t, I don’t need my plate back. What I’ll often do to make sure that my cake doesn’t slide around as I’ll put a little dollop of icing on the plate that will ensure that your cake does not slide around. if you guys want to do that, feel free. yeah, I made butter cream for everybody, and there’s more.
If you guys feel like your cake is lopsided or. If you feel like your cake is lopsided, or let’s say that you didn’t set your timer right and you forgot about your cakes, and maybe the bottom of your cake burned, you want to shave that off. You do not want to have burnt cake, you would just use a serrated knife like you would use the cut bagels or bread and you. Just shave it off. when I was a cake decorator and we did wedding cakes, we cut. All of this off. We would shave off all the top.
Great. With the grater we would grate the sides off because I don’t know my store just didn’t. That was just the way that we did it. too, like when you cut the cake, it’s pristine, right? You’re not going to see.
Brown and yellow and white. everything is beautiful.
When you put your cake in the pans and I weigh mine that I made sure that. Each one was even. You take your cake pan and you drop it everything the. Air bubbles come out. And two, you can alsorry two you can altake a spatula and smooth it out. Smooth the top out. that’s part of it too.
But althat can be because your oven temperature.
Your back could be slightly. Lock sided too but.
Or your oven temperature isn’t even throughout so.
Yeah, that’s my issue.
And that’s a good point too. if you don’t know how your temperature, how your oven bakes, you might. Want I have a. A thermometer that hangs in my oven and I just make sure I know my oven well enough now that I know that it bakes correctly but at the beginning when I first moved into our house. I wasn’t sure, I had the thermometer in there that just made sure that it was at 3:50.
I brought some canned frosting because I wanted to show you guys how to use it. I don’t recommend using canned vanilla icing. It’s too loose. I don’t like the consistency of it, but I do like the consistency of chocolate fudge icing. But you can’t ice like this. You have to stir. Like, really get in there, stir it a lot. It’s going to change the color of it. It’s going to change the consistency of it. It’s going to make it easier. To spread. I. I’m trying to decide if I want to do. Yeah, and this is room temperature straight out straight from bonds. if you wanted to put a filling inside of your cake other than frosting. Like let’s say you wanted to do strawberries or a Jelly or.
And that’s room temperature, right?
You want to do a pipe around to make like a well and then you want to put the filling only on the inside that when you put your top layer on and then you ice, it doesn’t squish out. Pipe around.
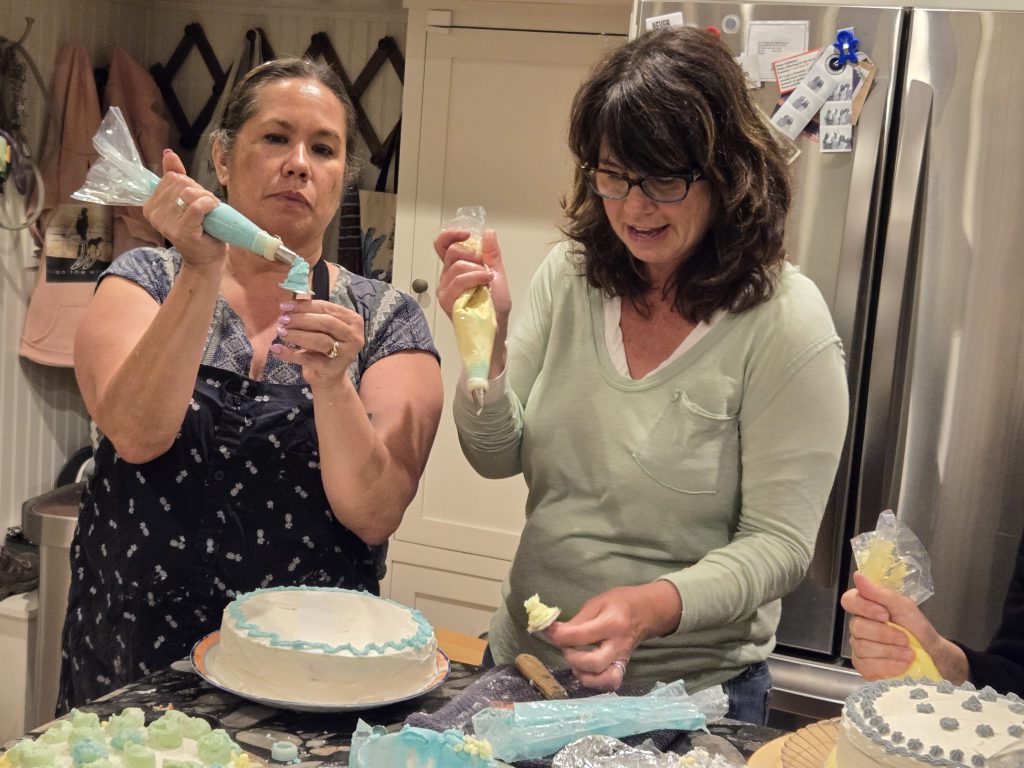
This is what a piping bag looks like. They come in different sizes anywhere I think they start at 10 inches up to 60. Yeah, these are reusable. I will say that icing is pretty greasy. you do have to have like really hot water to get this stuff clean. This is called a coupler.
And what a coupler does is I was explaining earlier is this allows you to make one bag of icing and switch the tips out. let’s say I want to do pink roses and pink writing and maybe a pink border and they’re all going to be different tips. instead of having three different bags, I’m going to have one bag of icing and I can. Switch the tip out. this part goes inside this bag. This one is cut for me to use the my bigger tips. if I’m doing like. If I’m doing cupcakes, I’m going to use a bigger tip right into this one, which I I’ll cut it I. Don’t. Mind, but this one is used to wear the tip just drops in and it there’s enough stick it out. But if I’m. Going to use a coupler. And put this in and then I have to cut it because the coupler is not showing. then you would just cut off the edge. And then get your coupler out. Put your tip in the big tips don’t need couplers, but the smaller tips all need couplers and you guys can get like a. You can get like a small thing of tips. I mean anywhere. Really. I saw them at smart and final today actually. Or you can just call me. And I’ll make a cake for you.
Couple ways that you can do this. Esther, do you have a glass like a tall glass? So.
In fact, starting out and it’s like, all weird because you’re trying to get icing into this bag and not make a mess, you can put your bag inside the cup like this.
Inside your glass and then you can fill your icing and then you would just you want to keep your icing inside. you wouldn’t like you get it up and go around like that what I would recommend for you guys, we’re gonna get to the icing in a minute, but I wanted to. Show you like if. I was going to do a filling inside the cake. hold the bag. We’ve got the. Added a good halfway down. Have the hole inside you would pick up your icing, put it in squeeze. And pull up. Then your knife should be pretty clean,
And then just repeat.
you don’t want to fill your bag up too much. Because it’s hard to control. Yeah, after you get your icing in. Squeeze it down. Try to get some air out. Try to get the air. Out and then. You’re going to twist, you don’t need the rubber band. I see those little rubber band contraptions. You don’t need those. You just need to twist your back a lot. And you alwant to hold from the top. Think of this as like a tube of toothpaste. If you hold it down here, all your ice is going to flop out. you want to hold it from the top. From where you’re twisting.if I was going to fill this up with a filling inside, first thing I would do. It’s squeeze, I’m squeezing with my right hand and like guiding with my left.
It shouldn’t go anywhere. Strawberries. I will say this. if you do want to do like a fresh strawberry filling. There there’s a strawberry glaze that’s sold in the produce section. What I do for that is I would make this well, like this spread a little bit of strawberry glaze on it first. Thinly slice the strawberries. Lay the strawberries down and then a little, maybe a little bit of glaze on top, and then assemble the cake. Fresh fruits tricky. That keep it from getting, like really mushy.
I’m going to show you how to put the icing in the middle you don’t get crumbs everywhere. you guys that are single layers, you guys. Are so.
Do you want to cut the top of that. it’s just a little bit flatter, it’s. Up to you.
It everybody has a spatula. You need one.
you’re going to. Scoop it in and only like the first half, but the top half is you want a big clump of icing and you want to flip it on the cake. Now do that about three more Times Now. That’s because what you don’t want to do is get a bunch of crumbs.
Yeah, But just don’t worry about the hole. Actually, you know what you’re going to do is you’re going to fill it in with icing.
QUESTION: should you always freeze the cake before you frost it?
Yes, yes/
If you were to get crumbs on your spatula, please do not put it in the community pot. You’re actually going to scrape it off to the side.
QUESTION: how did you get your frosting smooth?
room temperature butter.
I do use equal parts crisco and butter, and then you beat them. You beat the butter, beat it, beat it, beat it in your mixer. Then you add the Crisco. Then you beat, beat, beat, Beat, Beat, Beat, beat. Make sure it’s really incorporated. You’re scraping the bowl and then powdered sugar a cup at a time, and then a little bit of milk, a little bit of vanilla.
Well, no, hold on one second because we’re going to talk about like the icing. again, like this top half of your spatula is really where you’re working with, Like it kind of parallel with your cake. And then like move your back and forth, back and forth, back and forth, back and forth, back and forth.
And do you try to like do like a little bit of an overhang on your icing like you really want that thing iced because when you put the other icing on and then you do the sides, you don’t want like indent, you don’t want like an hourglass, right?
All right. the way that generally I take my cakes and I’ll actually ice the bottom, I’ll put my middles together. This is just I know that this is flat right? This this might not be flat, but this is definitely gonna be flat, that’s how I.
we’re going to put some glue in. The middle and by glue I mean.
She flipped my cake over because it’s flatter on the bottom. Now she’s filling my crack.
before we start icing the cake We need to Make sure that the plate is clean.
Because you don’t want crumbs in your cake. you’re going to make sure that your that your plate is as clean as possible, you don’t want any of the gooey cake top or anything like that.
Actually, my favorite icing is mixing chocolate frosting and vanilla frosting together and making. A chocolate butter. That’s actually my favorite icing.
I’ll make chocolate butter Frosting then. that’s when you use your classic buttercream, butter, butter, sugar. You make that up and then you mix some store bought in.
Lots of stirring.
Canister of chocolate. Pillsbury made chocolate fudge. Cream chocolate fudge. Whatever is cheap, I bought the cheapest one, no?
it still needs more stir stirring, because it’s still, like too thick.
It does change. It changes, color changes consistency.
And then the lighter it gets you’re adding your white butter cream into the chocolate into the chocolate fudge.
So, adding some butter cream.
You guys want to taste it before I because it’s like a little bit it like cuts the sweetness down, it’s, but then it’s not that thick, heavy chocolate.
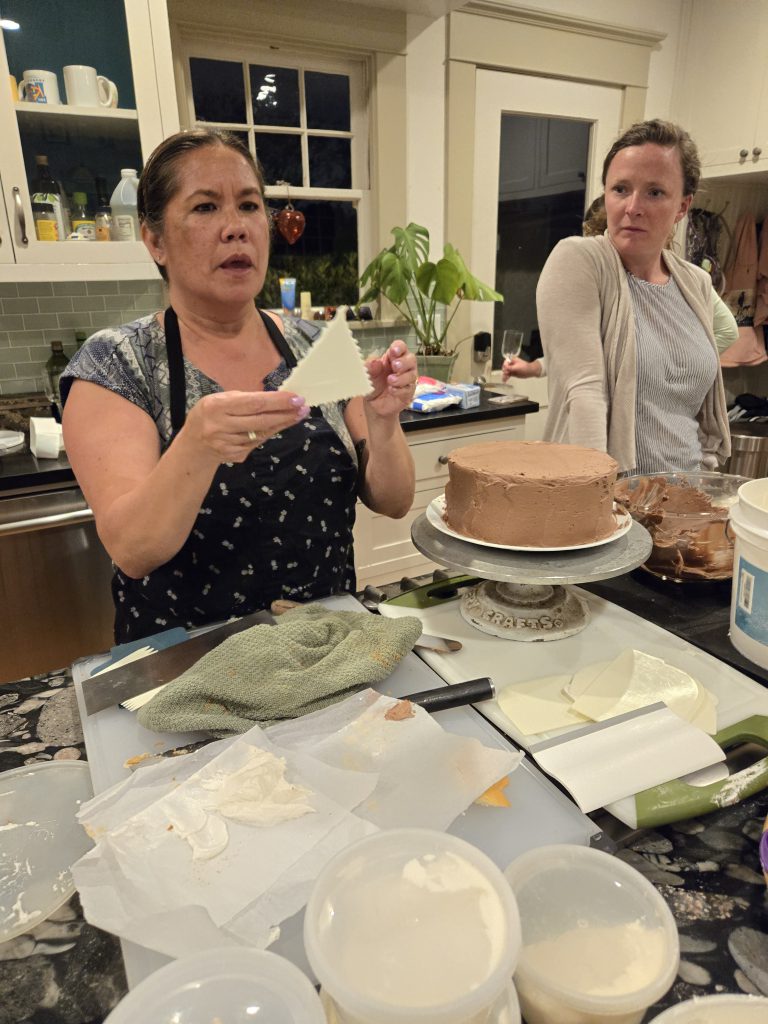
let me demonstrate, and then I’ll let somebody I’ll pass my turntable on to. It is 2 pieces. They come apart, please handle it by the bottom. You know why? Because accidents happened, and now we’re gonna. Now we’re gonna talk about how we fix it.but we need to clean your pan off.
The top half of the spatula only is what we want to do that’s Where you have the. Control is at the top half of the spatula. you’re going to put it in the middle. Where we put their spatula in the middle and you’re going to spread it out. I’m not turning my turntable, I’m going to spread it out. And then because I have a turntable, I’m going to spread the other side.
And you want to try not to lift your spatula, cause that’s going to get crumps you’re going to get, you’re going to get Crumbs in turn if you guys want to hang tight, I will probably pass the turntable around.
it’s going to go over the sides a. Little bit so. Before you move to the sides, though, you want to try to smooth it as much as possible, this is where you kind of got to do. You’re going to use the edge of the spatula.you want to put the spatula. What is that? Would you call that 45°? about 45.
One side. Because you’re only using one. Sorry, you’re only using. Outside of the spatula to ice. Sorry.you’re about a 45 degree angle. And because I have, because I have the turntable. But I’ll share. The turntable will be fine.
And you’re trying to smooth out as much as possible.
And then if you have like if it’s too goofy, hold on. Let me let you use the turntable cause your your cake is pretty big. if you’re special, it gets goopy, wipe it on the edge of the bowl unless you have crumbs in it. If you have crumbs in it, it goes.
there you go. keep going. you’re going to just keep going around and around and around and eventually magically it will Become smoother.keep going.now stop, wipe your knife, wipe your, wipe, your wipe your thing. Now, through the middle, I want you to go from 1 edge to the other edge. And I want you to come towards yourself.
One big swipe with confidence, but through the middle there you go. Good. Now through the middle.
we’re going to don’t no more icing for you. I’ll help you in one second. if you have icing, that’s starting to drip down the side like that, that’s where you’re going to start. On the side. You’re going to straight up and down perpendicular to your cake and you’re going to spread.
Spread it around a little bit, a little bit, a little. Back and forth, back and forth.
Like little, I mean like. An inch that way, an inch back an inch, you know, like really small movements are going to be your friend. And then when you need more icing. Because everybody’s gonna need a little bit. More frosting. you’re going to. Top half of this knife only. You’re going to get another gloop of icing. Glob of icing.this is very important.
All eyes on me so. How am I going to get this from here to here. I’m going to actually apply it to the top And it goes this way, I put it to the edge of the cake.
Anything, I still need more icing. I’m going to. Go to the side I’m. Going. To swoop it, it’s all going to come off almost all the icing came off my knife and then side to side side to side, side to side.
It takes probably twice the amount of Frosting than you think it’s going to take.
QUESTION: Recipe for buttercream?
It’s actually the Wilton. It’s the same one that Wilton put out100 years ago. It’s the exact same frosting.
I use Crisco in my Christmas coies cause it’s good and I can’t tell anyone because people my family won’t eat it and like.It is like a dirty little secret.
you’re going to do the same thing, you’re going to well now instead of doing the top and letting.
It work down. On top of the knife, put a little bit of icing.
Yeah, top of the spatula. And now just work that one area, yes.
I will. I’ll take this time to let you know that icing. The icing that I made for decorating is thicker than what I made for icing, this I didn’t put as much milk in and you can actually add more powdered sugar, which is what I’m planning to do. I’m going to scrape all these bowls and I’m going to add more powdered sugar to it and it’ll.
Thicken the icing up. That makes it easier to make flowers And do border work.
what you can do at this point, Kirsten, you’re at a good spot. And I’m actually going to let you use the turntable. once your cake looks like this or something like this.
Once it starts to layer cake, you’re actually going to pull. Pull the edges in.like, like, what’s that angle? Esther one. It’s it’s pretty. It’s pretty. you want it like so? As you as you bring. You bring towards you. Uh-huh.white. You wanna wipe every time.bring it towards you. White, bring it towards you. White towards you white,
Ah, now around the edge we have other tools for around the edge.
The edge you do the same thing.
These I bought at Home Depot this weekend while I was there. They were found in the paint section I where the stucco like the paint patches are. They’re flexible. I like them because they’re pretty flexible. there’s these. This is a comb, if you want a little design in the side, you could have a little design in the side.
Store this one’s from a cake store. Yeah, this one I bought because I did right now the trend is to do a very tall cake, like a four layer cake, I don’t have a scraper. I didn’t have a scraper that was tall enough, I had to buy one. this is my new scraper that I’m excited to. These are all very these. Again, I think some of these may have come from the hardware store, but they’re kind of some of them are a little bit beat up. Some of them I use for like bed scraping. if you get one and you get. Because this got melted I think, but the sides totally available. But when you use these. You actually want to have a pretty good angle on it, because if you go straight at it this way, it’s going to take a lot of the frosting off, which really you’re just trying to put the design on it.first thing we’re going do.
Is everybody’s going to get a scraper, everybody’s going to get a scraper.
You show me again what you were doing.
The swoop? Yeah, the scoop. The scoop for the top.
She was bringing it towards her at the very end. Why?
Because you’re you’re starting to go rounded.
If your cake wasn’t super flat to start with and it is a little bit hard to kind of overcompensate because then you’re going to have To A bunch of frosting on your corners.did everybody get a scraper? Regular scrapers. Just scrape it smooth.
we probably all a lot of us. Are on plates.that’s you want to try to get as close. To your plates and cake, but be straight up and down as possible. Does that make sense? Yes, And if you want to wait to use the turntable, you can definitely you can hold on a second so. I’m going to put it at like what is this 3:00, right? Yeah, 3:00 start at 3:00. And go and then I’m going to turn my turntable counterclockwise. Counterclockwise. turn. And I’m not. I’m just holding it still.
And then scrape. Try to go all the way around the cake in one time if you can.
QUESTION: If you’re going to do a design, do you do this first?
Yes, because I like to try to get as much of the icing off as.
To do that. my see here like I didn’t have enough icing down here at the bottom. I could go back in with icing. Or I could try it one more scrape around and see if.
We’re gonna put decorations on that because you don’t want to keep scraping, cause you’re just gonna keep exposing more cake.
You’re going to use your scraper and you’re going to hold it at a different angle. 45 The other way. And you’re going. To spin it and it’s going to. Clean up your plate, ?
Do like one more. One more right, one more wrap around. And two, think about like if you only have one spot that has that showing, you put that in the back of the cake.
more than likely you probably have some build up on the top right, because you’ve done all that scraping around and around and around. now I’m going to straighten that out because I’m going to. Now I’m going to use a scraper and I’m going to hold it pretty flat against the cake. And I’m just going to do little swipes to the middle, and you don’t have to clean off your turntable, I will tell you I’ve had this turntable for 25 years. I did get it from the bakery that I worked at but they’re not cheap, but you can get. A cheap version.
Those are IKEA.
Now I have seen I have seen one. If you were going to put it straight on a plate, you would put wax paper like you would do this like little border of wax paper that you could pull the wax paper out. But.
you’re not, you’re not trying to scrape anymore off. Now you’re just barely touching it to to just put the little indentations in. Yeah, don’t think of it as.
You said a box. When you’re doing this for a customer.
I have a like cardboard like disposable cardboard plates. Like a cardboard. Like a disc, And it has like a grease proof top on it.
That’s the things we’ve seen at Vons.
A border around the top. I usually do that I. Do it or do it second, I don’t know. We’ll do it now. I’m going to give. if everybody wants to come and get a bag.
A computer for this one. And then you can tell me do you want? Like something that los like more like of a bead, like no, and then take, you know what? Why don’t I do like a demonstration? That way you can like.
this one’s actually a leaf tip, but it makes a cool it will make a cool border.
Pressure, pressure, pressure, stop, pressure, pressure, pressure. Stop. like, squeeze and then stop, squeeze and then stop. if you wanted to. it’s like the ruffles.that’s that one. Yes. That’s what all this is for.
You need to get a new number 10.this one you can do like this. You can do a ruffle like that or a shell border like that or you can do this one. Like think about it like like an S like forming an S you can do like this.
And like I’m thinking more like border along the side. you could do and to measure it out. This is something that we used to do for wedding cakes. it would be precise is you would actually take back in the day they were Styrofoam cups like disposable coffee cups and you would cut it in half and then you would score the cake. you would. Put exactly that your your scallops would be perfect. Every single one would be perfect, and then you would start. You would actually start in the back that if they don’t mind that it’s And then the last two, you kind of like your last loop is a little bit bigger.so.
this is a flower tip. It’s a rose tip, but you can, depending on which way you hold it, open side or so. It’s like a teardrop pointy side down versus pointy side up pointy side up is when you do flowers. But I tend to do if I’m going to do a border, I do pointy side down and for that one you could. Also, just do. Like it’s. Like squeeze, stop, squeeze, stop, squeeze, stop. And that’s.
Do you want it to be? This can be your top order, you just don’t have to do it as exaggerated like this is exaggerated. Like for a side board this this would be the top, right? There’s the edge and the bottom, the edge and the bottom.
This could be you could do that as the top two or you could do it on the side. You can do it on the side or the bottom side. It’s all, it’s just there’s lots of options, lots and lots of options,
I’m going to. Do a quick clean up one thing you can do to not get a little comes in your cake is you can actually, it’s called a crumb coat. what you would do is you would like kind of you would do a very thin layer of icing and actually have a lot of the cake showing you stick it back in the freezer and then you ice it frozen. That’ll help contain the. The cake crumbs I worked in a big giant bakery. There was no time to come, coach. We I had to learn how to ice and not get crumbs in my.
Do you guys want to keep a little bit of frosting out? Are you some frosting? Well, think about it, because you’re going to put. Yeah, cause think about it. You’re going to put a border on it. You’re gonna put some flowers on it.
You want to use this this whip, but if you’re making icing, if you’re making cake, if you’re making batter, you want to use the paddle. Only use the paddle.
I’m just gonna add powder sugar.
Is when you put your powdered sugar in or your flour in or whatever loose, fluffy gunk you’re using.
You want to Gently put your your thing down. I take a tea towel and I wrap it around here and then low speed and then pick it up,
I brought gel. Food coloring. instead of those little liquid drops that you guys do for Easter. That will never work for cake icing. It’ll make it wet. It’ll like break your icing down and you’ll never get the color that you want. Wilton, these are Wilton ones and then I recently went to a cake shop that’s down in Chula Vista.
Standlees.
I was like, seriously geeking out in there. I was like, totally cake geeking out. I was like, my God.
Where you can get flavors too.
You can get flavors. Yeah, that shop is super cute. It’s on 3rd Ave. It’s super cute. Part of Chula Vista, the village. Very, very cute.
This the reason why I like this too is it just takes like the most minuscule amounts to dye your icing. does anybody want? Does anybody want a specific color?
Just do summertime pink and purple green.
you need green for leaves.
And then there’s red. There’s red that has no taste because some red can be bitter. there’s red that has no taste. You just have. It’ll say it on the on the what you call it. Let me see that one. Julie. Let me see it. if you get icing on your handles or whatever, just wipe it off.
Try to keep your tools clean, because you have to think about it, your hands are hot. Hands are going to heat the icing up and it’s going to make it harder. And harder to try to do stuff. you really want it thick.
why don’t we do some color switching we can do yellow 1st and then turn it into orange and then we can do.
Blue. And then turn it into green.
Make purple, purple. We’ll just make purple. I’m gonna do this one for green because we. Don’t need a lot of green.
All right, let’s just keep the toothpicks. 1 toothpick per color. let’s not mix toothpicks that I don’t get. Blue in my yellow and then I get home and I try to do something yellow and there’s a bunch of blue in there, just keep the toothpicks. Only one per color please. What color you want, teal? Is it open? Open. It’s not open. You get to open it. do. You have a use these. This stuff makes a. Mess, you don’t mind getting possibly stains, you’re going to just go around the edge and get it open, but then don’t waste anything. That’s if you can scrape off what’s on there into the icing.
Is it liquid or?
Is gel and it does not take much and you can always. Add more. start out with a little touch and then keep adding as you need it and what you want to do with the icing is you want to get like a little glob.
That’s probably a lot. That’s probably actually going to be a lot. And then you just touch it into the icing.
It probably could use a little bit more and your colors will darken over time.
I’ve just started going there because I’m going to take boxes I needed like one cake box and the ones that they sell at Michaels are really expensive.
Super cute. I actually bought whipped cream from there, they have frozen whipped cream.
That already has the stabilizer in it, because if you just take heavy whipping cream and whip it, that’s fine.
Well, let’s like compare it to the others too, like if we’re going to do like color like all together and we’ll do. We have one more color. What color do?
I know. I was thinking I might be. Going. To. This Memorial Day party this weekend I do mine red. White and blue. See, that’s what I’m thinking about though, because today’s already Thursday party’s not till Saturday. I don’t want to put it in the freezer because the red and the blue, I’m worried it’s going to. Bleed when it falls. But it might not.
All right. Do you guys want to do a border first or do you want to, like, learn some flowers 1st order, first order first, Do you guys wanna do white? Or do you want to do?
We’ll do that, if everybody wants to come grab a disposable bag with the. And you’re going to put the couple of. In first and we’ll cut late, we’ll cut next. Cut the tip open. Next. put your coupler in pointy side down. Make sure it has a screw with it. And then take your icing. Remember, we’re going to fold the bag down.
you put the icing in before you. Cut it, ?
yeah, parchment you can take a parchment roll and rip off like a good rectangle size, and then roll it up. It’s a little bit complicated next level, I thought we’d stick with. The bag. Thank you. if you have some portrait favor, I’ll show you. Well, check. We’ll check the trick. But you should use. Perfect paper, not rock.
now you’re going to get else to put it. in the bag, squeeze your fingers, pull it out. And it should be pretty clean.open the bag. Back up. And repeat.
Yeah, don’t put that part in. Put that point in point down a little bit more. you want to kind of because you want to, it’s this fine line right between am I going to be able to handle how much icing is in the bag versus how many times am I going to have to fill up the bag. it is a little bit of a fine line.
, if you cut it. Too big then it’s just. Going to fall out. But if you don’t cut it enough, better to not cut too much. Cut small first. I’m going to cut where it’s coming too naturally.it’s falling down in there. I’m going to cut, And then squeeze a little bit. And I did not cut enough because I don’t have enough of the.
Couple are showing to then be able to screw it. I need to cut more plastic cut to where. You see where I’ll be able to access the the screw parts. On the coupler.
And if it falls out, then we. Just start over.
Keep cutting. Nope. You gotta cut more. Cut into. Where the screws are cut like.
To cut like here. Yeah, cut like to where the screws are or the threads are sorry. let me use the right.
Well, I’m just coming.
Turn. A little bit more. Yeah, a. Little bit more cut to where the threads. Your couplers in.
, now we’re going to choose a tip. whenever you got your icing in a good spot, maybe next time we’ll cut the maybe we’ll cut the next time we’ll cut the bag first. It’sit’s It’s totally
you’re mixing green and blue, right? to mix. let me show you. Let me show you how to mix a color because right now you’re going to get green until you get to the blue, right, but if you. Want to mix colors? You don’t need the instructions just for me.
Design part is facing down but I want to make like a variegated flower.what I’m going to do. For that, open the bag.
Hold it. Just hold it with your fingers.
. we’re going to need a new back. You’re just going. To need back, it’s It’s All right. for this one. To do like a variegated to. Do like a stripe. I’m going to take the icing. And I’m going to literally stripe it up one side, and then I’m gonna stripe it to the other side, fall out.that’s We’re gonna. We’re gonna start over. We’re gonna. It’s We’re gonna. We’re gonna squeeze. if your coupler came.
You’re going to squeeze all the icing back into the tub and we’re going to start over because it’s.it’s Not a big deal. It’s all good. squeeze it all back and then we’re going to do the reverse. We’re going to. Actually cut it.
First, because the coupler goes over the bag.
Take the ring back off. ring. There you are. You’ve got. let me double check out my bosses.
For making flowers, not for making a. Border. on the inside, there’s like a little thing. if you squeeze that, it kind of like makes an indention to where you would put like.
One leaf at a time and goes around right.
that tip right there is going to use a lot of icing. That’s like when you use for cupcakes, ?
You wanna do like rosettes, big gotcha. I’m trying to get the tip in as far as I could. It’s not gonna be enough, I’m gonna. Cut it a little.
if you want to make a rose and you’re going to need a nail.you have to have a nail in order to make a rose.
Yes, go ahead and cut it a little bit. Cut it a little bit. Keep cutting it until you just have the threads.
Yes. you’re going to hold your nail if you’re right hand dominant, your icing is going to be in your right hand. If your left hand. I can’t help you. No, I’m. Just jing. you’re. Twirl. Your nail.my little platforms wonky, but that’s you’re going to twirl, twirl, twirl, practice twirling. Cause that’s going to be like the weird part back and forth twirling. good. Like kind of spread it. Spread your hand like your fingers out like.
Yes, first you have to make the inside of the. Rose. And you the way I do it, because there’s different methods, but the way I do it is point is up open part at the bottom very important and then you’re going to twirl.
Whirl the nail.
As you’re squeezing the bag and I’m going to make a cone.but it’s a three-part process. Julie, hold the bag. Like this. No, hold. Like underneath. Give it a good. Twist. Good, good, good, good, good. Twist. I’m going to make. My bottom part, which is going to be the biggest, I’m going. To. Twirl I had an air bubble, I’m going. To twirl around. Pretty high and that’s going to be it’s not perfect. But that’s It’s going to be kind. Of open the round parts on the bottom. The front and the pointy parts at. The top and then I’m going to make my second layer.I’m then then my third layer icing is a little bit goofy, and then on the third layer on the top. You want to. As you’re squeezing, you want to bring it down. I’ll start over. we’ll do it again, spend, spend, spend. kind of if you go around and then another on top of that and then the top one is just a little tiny, but bring it down because that’s going to be like the middle part of the ropes.
That’s nice right there. It’s taking a little bud.
a little three-part then when you’re making the the actual flowers, the petals, you’re.
You’re fine. when you’re going to make the actual petals, you’re going to start at the top and you’re going.
To make little tiny ups and down and like 3 at the beginning, 3 little up and down. And then where they come together.
You’re going to overlap that.
then you’re kind of going around and around and around and around?
Made it will be like all the way around.that los how do we get it off? That’s what the scissors are for.
I’m going to make like a target, right? where do I want this rose to be? I want it to. Be right here. And then what? What’s the prettiest way? It’s loing to me. It los best. you do want to kind of arrange it the right way, right? you take your scissors and you just kind of like lift it. Right. you lo like open scissors. You lift it up and drop it. close the scissors and pull it out.These are just like little tiny, crafty scissors. I don’t know. I forgot my. Scissors at home. You can aluse. You can aluse an offset spatula, but I’m just not very good at it.
Yes. Well no, because see how it’s wiggly on one side. it’s kind of more like a border tip because you’re not going to see that because the.
Alright, Daisy demonstration Daisy. daisies go just straight on the cake. You don’t need an. But you kind of need to like know where you’re going to put your Daisy. Right. you kind of want to imagine a little circle that it has, it can meet back together. for this one, you’re going to hold your. I have the Rose tip, which is the pointy at the top open at the bottom. Of like tear drop and you want to have the point up open part down. And then you’re gonna. Angle your tip 45°, picking up on a theme here and then you’re going to I know. Lo at that. She’s like a pro. you’re going to do, you’re going to make like this motion. you’re going to squeeze.
You’re going to like, ? So, like a squeeze up and back. My tip is actually. Kind of small for this. And then you’re going to go all the way around. having a turntable definitely is helpful for this one, and you’re just going to go around, go around, go around, and then your last one will just kind of end up on top. And then you’ll want to take a different color and do a little middle. who’s see? What do? You have.
Middle and then if you cut it. Instead of cutting traditional wedges.You cut it straight next to it and. Then you get. Long, skinny slices of cake, right? And then you can stretch the cake out for that, or will serve more people.And they’re more serving size pieces, like sometimes people don’t eat the whole piece.
QUESTION: How to bake cupcakes.
Rice underneath the cup. Sorry. Uncoed rice cupcake liner. Then you’re better because it creates a like little air pocket, right? But I recently just got brand new. Cupcake pans and I found ones that have this. Rice underneath your cupcake liner. Game change.
QUESTION: About how long to bake the cake and test it? Bake it for less time.
Less time. Just three minutes, less of the lesser. Like if it says 26 to 34 minutes, start checking at 24 minutes. My cupcakes. I’ve never bake them for 15 minutes. I start checking in around 11 minutes and it’s the same thing, but just touch it and if it springs back, it’s done.